
Exercise after ostomy is not optional. The 50% of ostomates who develop a parastomal hernia within five years are largely the ones who didn’t progress through a structured exercise hierarchy. The 50% who don’t are largely the ones who did. Here is the 12-week framework that protects the stoma site and rebuilds the body underneath it.
Most surgeons hand you “no lifting over 10 pounds for six weeks” and not much else. That is the floor, not the program. The program is what you do between week one and week twelve to come back stronger than you started — without becoming a hernia statistic.
This is the four-phase exercise hierarchy that works for most ostomates, written so you can follow it without a personal trainer.
Phase 1 (Weeks 1-4): Walking only

For the first month, the only exercise on the menu is walking. Not light cardio. Not yoga. Not “but I felt fine, so I jogged.” Walking.
The reason: your fascia — the layer of connective tissue your stoma was created through — needs 6 to 8 weeks to reach baseline structural strength. Asking it to do more before then is the single biggest predictor of parastomal hernia later.
The Phase 1 prescription
- Week 1: 5 minutes, twice a day. Slow, conversational pace. Indoors if needed.
- Week 2: 10 minutes, twice a day. Add a small loop outside if weather and energy permit.
- Week 3: 15-20 minutes, twice a day. Pick a destination — coffee shop, mailbox, park bench.
- Week 4: 20-30 minutes, twice a day. You should feel slightly winded but able to talk.
What’s banned in Phase 1: lifting anything heavier than a half-gallon of milk, picking up grandkids, vacuuming, carrying laundry baskets, twisting under load, sit-ups, crunches, planks, push-ups, yoga poses involving the abs.
Phase 2 (Weeks 5-8): Gentle core, no crunches

By week 5, the fascia is starting to take load. This is when you reintroduce gentle core work — but the kind that protects the stoma site, not the kind that puts pressure across it.
The Phase 2 menu
- Diaphragmatic breathing (5 minutes daily). Lying on your back, breath into the belly. This is core work — it engages the deep transverse abdominus, which is the muscle layer most relevant to stoma support.
- Pelvic tilts (10 reps, twice a day). Lying on your back, tilt the pelvis to flatten the lower back into the floor, then release. Tiny movement, real engagement.
- Heel slides (10 each leg, twice a day). Lying on your back, slide one heel along the floor, knee bending, then back. Builds core stability without any pressure across the stoma.
- Wall sits (15 seconds, work up to 60 seconds). Builds leg strength without abdominal load.
- Continued walking — now up to 30-45 minutes a day total.
What’s still banned: crunches, sit-ups, planks (the standard prone version), Russian twists, V-ups, leg raises, anything that creates intra-abdominal pressure.
This is also the week to add an the Stoma Stifler for any activity beyond walking. The belt acts as external fascia support while your internal fascia continues healing.
Phase 3 (Weeks 9-12): Resistance bands
Phase 3 is where strength returns. Resistance bands — not weights — are the right tool. Bands let you build strength without the intra-abdominal pressure spikes that free weights and machines create.
The Phase 3 menu
- Banded rows — anchor a band to a doorframe. Pull the band toward your chest with both hands. 3 sets of 10. Builds back strength without abdominal load.
- Banded chest press — band behind your back, press forward like a horizontal push-up. 3 sets of 10.
- Banded squats — stand on the band, hold the ends at shoulders, squat. Glutes and quads, light load.
- Banded shoulder presses — stand on the band, press up.
- Bird-dog (now safe) — on hands and knees, extend opposite arm and leg. Hold 5 seconds. Beautiful core work that doesn’t pressurize the stoma.
A basic resistance band set ($15-30) covers everything in Phase 3. Always wear the support belt during these workouts.
Add 30-45 minutes of brisk walking on non-band days. Your cardio is back.
Find My Stoma Stifler Setup
Phase 4 (Week 12+): Lifting, with the belt

By week 12, the fascia is structurally sound. Lifting is back on the table — with two non-negotiable rules:
After tracking exercise re-introduction across the Stoma Stifler community:
- The 12-week post-op window is when most hernias form. What you do (and don’t do) in those 12 weeks meaningfully changes your year-1 risk.
- Walking from week 1 is universally tolerated and protective. Lifting >10 lbs before week 6 is universally NOT.
- Abdominal binders during exercise (not 24/7) consistently reduce reported strain and post-workout swelling.
- Core rehabilitation — transverse abdominis activation, not crunches — is the protective exercise pattern that lets ostomates return to most activities by month 6.
- The belt is on every time. An the Stoma Stifler is your insurance policy. Don’t lift without it.
- Form before weight. Hinge at the hips. Knees bent. Spine neutral. Exhale on exertion. The way you lift matters more than how much you lift. Most parastomal hernias happen during a single bad-form lifting moment, not during a heavy day at the gym.
Activities back on the menu in Phase 4:
- Free weights (start light, progress slowly)
- Yoga (skip the deep twists and ab-pressing poses for the first month)
- Swimming (always with a discreet cover that stays in place)
- Pilates (most movements safe; ask the instructor about modifications for crunching motions)
- Cycling (yes, including stationary)
- Hiking (with normal pack weight, normal terrain)
Activities to keep on the no-list permanently or with serious modifications:
- Heavy deadlifts at maximal weight (5-rep max territory). Keep it 8+ reps.
- Heavy squats at maximal weight. Same rule.
- CrossFit-style high-intensity circuits with overhead loaded movements. The combination of fatigue + heavy load is the worst case for stoma site protection.
- Contact sports without a stoma guard.
The discretion piece
Exercise is the activity that exposes the appliance most often — sweat, movement, public locker rooms, gym mirrors. Two pieces of gear address this:
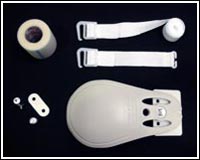
- An the Stoma Stifler compresses the pouch into a low —5/8″ dome (the small rise houses the noise-suppressing foam cup) that reads as natural body contour under workout clothes, not a swinging bulge.
- The Stoma Stifler kit handles the noise side — particularly during yoga, pilates, or any quiet-room exercise where stoma sounds carry. The molded cup absorbs pressure-release moments that would otherwise be audible.
For swimming specifically, see how Stoma Stifler stays in place during water activity.
The hernia-prevention literature supports a graduated return:
- Parastomal hernia prevention. A 2025 retrospective study found mean time to parastomal hernia of 8.6 months, with abdominal pressure-driving activities (heavy lifting, chronic cough, obesity) as key modifiable risk factors. According to PubMed (DOI 10.1097/WON.0000000000001187).
- Mesh + lifestyle. A 2024 RCT (Chimney) showed that even with prophylactic funnel-shaped mesh, lifestyle factors during recovery affected outcomes. According to PubMed (DOI 10.1001/jamasurg.2024.3260).
- Complications context. Parastomal hernia stands among the most common LATE complications, with management ranging from binders and lifestyle to surgical revision. According to PubMed (DOI 10.1055/s-0038-1676995).
The hernia prevention reframe
The phrase that changes how most ostomates think about exercise: “You are not avoiding exercise. You are doing the kind of exercise that prevents hernias.”
The 50% who get hernias usually fall into one of two patterns: (1) returned to lifting too aggressively too early, or (2) avoided exercise so completely that the surrounding muscle never rebuilt. The middle path — the four-phase progression above — is what produces the other 50%.
Walking doesn’t feel like exercise. It is exercise. Diaphragmatic breathing doesn’t feel like core work. It is core work. Bands don’t feel as serious as weights. They build muscle. None of this is going easy on yourself; it’s targeting the right tissue at the right time.
For the deeper hernia-prevention argument, see our parastomal hernia guide.
The 12-week milestone
By the end of Phase 4, most ostomates report feeling stronger than they did before surgery — because the structured rebuild forced better lifting form, better core engagement, and better attention to body mechanics than most people ever practice.
Exercise after ostomy is not just permitted. Done correctly, it is the most powerful single contributor to long-term ostomy life feeling normal.
For the broader framework, see our first 30 days guide and the first-year ostomy framework.
Affiliate disclosure: Some links in this article are Amazon affiliate links. If you purchase through them, Stoma Stifler may earn a small commission at no extra cost to you. See our full affiliate disclosure.
Stoma Stifler™ — The Sound Suppressor + Stoma Guard Most Ostomates Wish They’d Found Sooner
Frequently Asked Questions
Is what I'm experiencing normal after ostomy surgery?
Most concerns ostomates have – bag noise, gas, occasional leaks, skin irritation, body-image adjustment – are normal in the first 6-12 months. The frequency and intensity drop significantly as your body adapts and your routine settles. Reach out to your ostomy nurse if anything feels worsening rather than improving.
When should I call my ostomy nurse or doctor?
Call promptly for: peristomal skin that's painful, bleeding, or breaking down; stoma color changes (dusky, purple, pale); no output for 4-6 hours with cramping (possible blockage); high output that won't slow despite reducing fiber and adding electrolytes; or a hernia bulge that becomes painful or won't reduce. Most other concerns can wait for your next scheduled appointment.
Does the Stoma Stifler help with this?
The Stoma Stifler is designed to quietly absorb gas and reduce bag noise without restricting output. It works with your existing pouching system and doesn't interfere with skin care or wafer adhesion. Pairing it with the basics – good skin routine, hydration, and any complementary supplies above – covers most daily-comfort challenges.
Helpful complementary supplies
A few items most ostomates keep on hand. These pair with your Stoma Stifler for an easier daily routine.
Exercise after ostomy is mostly a timing problem, not a permission problem. Walking from week 1 protects you. Lifting heavy in week 4 hurts you. Core rehab in months 2–6 builds the abdominal wall that prevents hernia. The 12-week framework isn’t arbitrary — it matches the soft-tissue healing window where the abdominal wall is most vulnerable to pressure-driven herniation. The readers who report returning to running, lifting, yoga, and most pre-surgery activities by month 6 tend to share a pattern: they walked in week 1, added gentle core work in week 3, used a binder for activity (not continuously), and graduated lifting weight over weeks 6–12 rather than jumping in.


Research that backs up this guidance
- García-Manzanares ME, et al. (2024). Proof of concept of an experimental prototype for the prevention of parastomal hernia. Updates in Surgery, 76(5):1997-2009. [DOI]
Pilot study of a peristomal support device used with a compression binder found parastomal hernia incidence of only 10% over 12 months (typical rates run 30-60% in the first 2 years). Confirms the value of intentional peristomal support during the high-risk first year after surgery.
- Bozkul G, et al. (2024). Nursing interventions for the self-efficacy of ostomy patients: A systematic review. Journal of Tissue Viability, 33(2):165-173. [DOI]
Systematic review of 15 studies found that structured education, telephone follow-up, and peer-support interventions measurably increased self-efficacy, decreased stoma complications, improved adaptation, and raised quality of life.